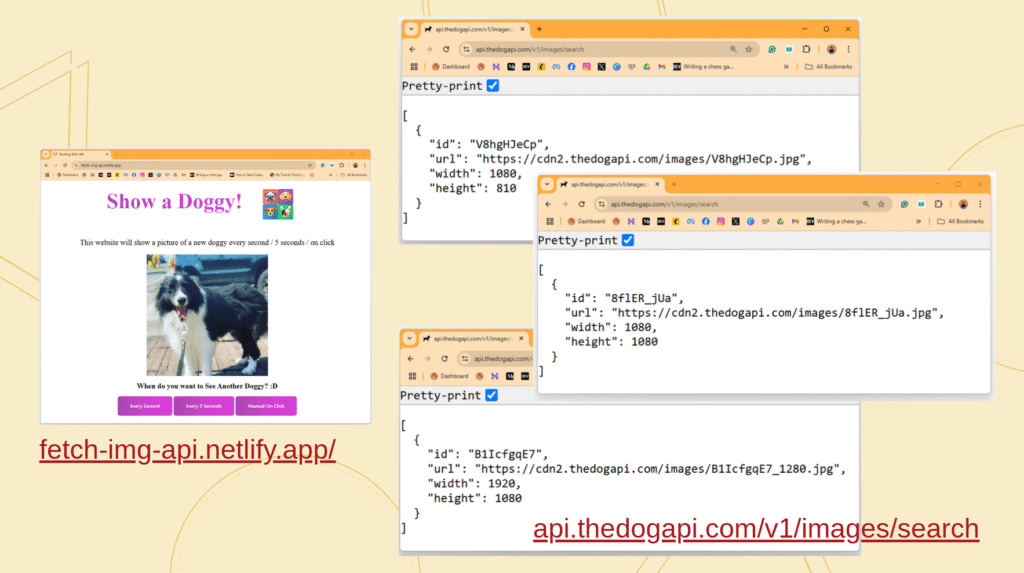
Have you ever used an API? In my time in Alicecode, teaching girls how to program, I created this simple demo: https://fetch-img-api.netlify.app/, which calls “The Dog API”. If you click the latter, you’ll see that every time you refresh, a different JSON object appears. I have wanted to create such an API ever since, and didn’t have the context to do it in… until today!
An API, or application programming interface, is a set of rules that allows different software applications to communicate and share data. A nice analogy often used is a waiter in a restaurant: The waiter hands you a menu of items that you can order from the kitchen. The kitchen is the Server, and the only way to access the kitchen is via a waiter. In addition, the customer (the client side) can add specific instructions about how they want those items prepared.
For our project, we will use Netlify. Netlify is a free and easy-to-use platform for deploying websites. The website I mentioned earlier, with the doggies, was deployed on Netlify. 😀
We will also use a Netlify feature called Netlify functions. Those are an easy way to deploy server-side code as API endpoints (using AWS lambdas behind the scenes). Note that Netlify functions can only be written in JS, TS, or Go, so give your Python skills a break for this one!
Project Introduction
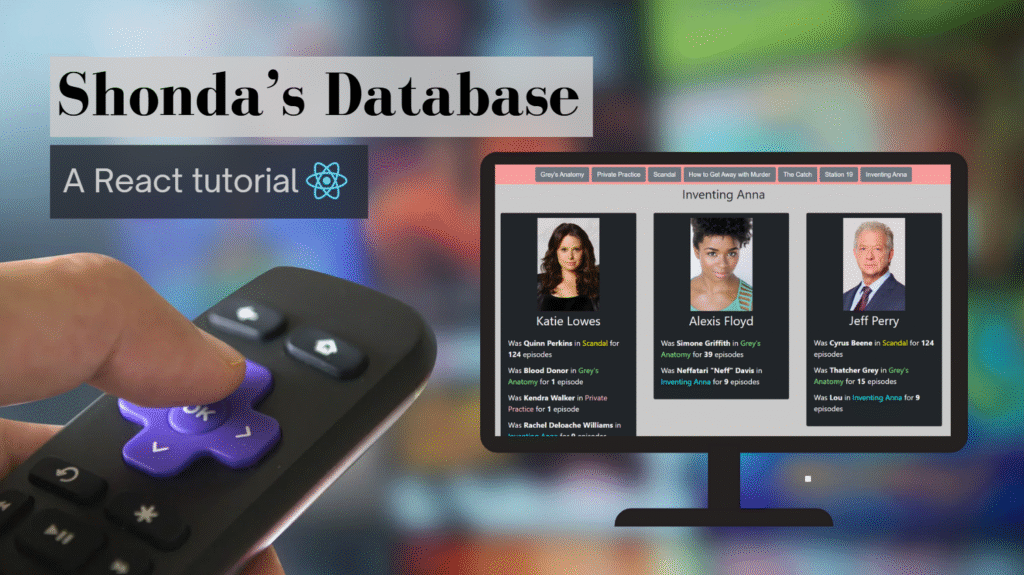
One day, I was re-watching a Scandal episode and suddenly noticed Penny from Grey’s Anatomy. Of course, all of the Shondaland fans know that Cyrus Beene is Meredith’s father and that Leo is Cooper from Private Practice, but it’s those characters who went unnoticed that I find fasinating: I am assuming these roles were a sort of a “there are no small parts, only small actors” moment that landed these actors bigger roles in the other shows.

Sure, I can check specific actors in IMDB, but I think the world needs a website where, given a show, it will tell you which characters the actors of that show played within Shondaland.
To gather the data, I used TMDB’s API (more about it in a future blog post!) and created my own data set file. This is because the majority of the data I work with is static: Most of the shows are off-air, and those that are still running don’t change cast frequently.
On The Agenda
- Make a simple API call work: get-ellen
- Deploying (locally and on Netlify)
- Create an API with external fetch: get-random-actor
- Create an API with input: get-top-cast
- Future plans
Ready to start? 😀
Make a Simple API Call
Open your favorite IDE with an empty folder, and then open a terminal:
- Install the netlify-cli and node-fetch and initialize a new project:
npm install netlify-cli -g
npm install node-fetch
npm init -y
You might see some deprecation warnings:
PS C:\Users\cupofcode>project> npm install netlify-cli -g
npm warn deprecated npmlog@5.0.1: This package is no longer supported.
npm warn deprecated rimraf@3.0.2: Rimraf versions prior to v4 are no longer supported
npm warn deprecated glob@8.1.0: Glob versions prior to v9 are no longer supported
npm warn deprecated are-we-there-yet@2.0.0: This package is no longer supported.
npm warn deprecated gauge@3.0.2: This package is no longer supported.

added 92 packages, removed 130 packages, and changed 1061 packages in 2m

251 packages are looking for funding
  run `npm fund` for details
npm notice
npm notice New major version of npm available! 10.7.0 -> 11.3.0
npm notice Changelog: https://github.com/npm/cli/releases/tag/v11.3.0
npm notice To update run: npm install -g npm@11.3.0
npm notice
This means that somewhere in the package dependency tree, there are deprecated packages: For example, glob@8.1.0:
PS C:\Users\cupofcode>project> npm list -g --depth=2
...
│ ├─┬ @netlify/zip-it-and-ship-it@10.0.6
│ │ ├── @babel/parser@7.26.1
...
│ │ ├── glob@8.1.0
There is nothing for us to do about it. But don’t worry — our project will still work!
2. Add directories: I find it nicer to have all my code under src/:
dist/for distributable, where the public code will be (Client side).serverless/for the functions running the API requests.db/for the dataset files.
3. Add netlify.toml file to root directory: We need to tell Netlify where to find the files within our project.
[build]
  publish = "src/dist/"
  functions = "src/serverless/"
4. Add a sample dataset file, justEllen.json, to the src/db/ directory:
{
  "actor": "Ellen Pompeo"
}
5. Add index.html and main.js to the src/dist/ directory:
- Line 7: The HTML file is using the main.js script
- The empty paragraph on line 11 (
<p>) will be used to present content.
- On line 2, the JS file is calling the Netlify function.
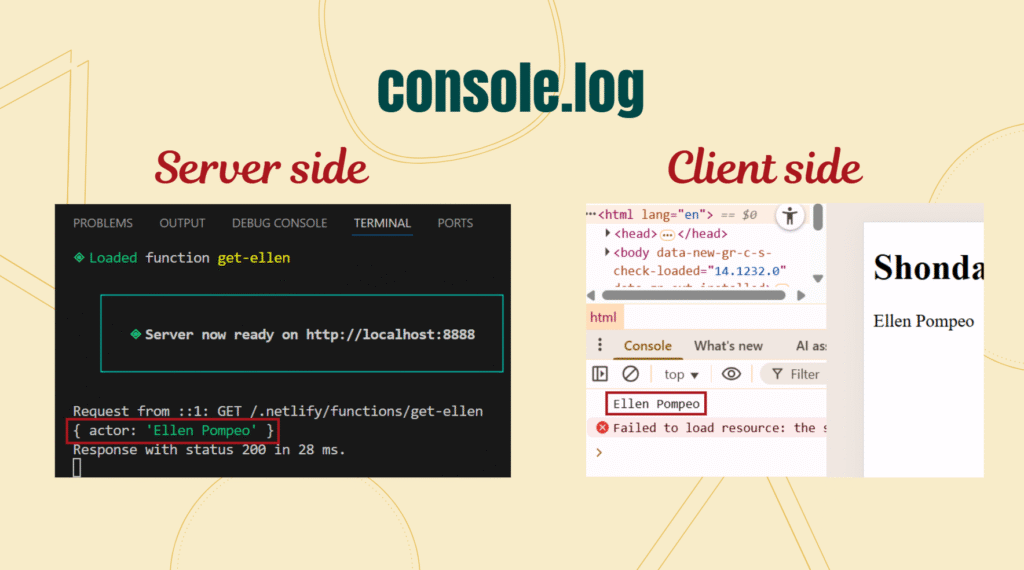
- Note that the log on line 5 appears on the client side, meaning you will see it in the browser’s console.
- Lines 9-10 are injecting content into the empty paragraph we saw earlier.
6. Add get-ellen.js to the src/serverless/ directory:
- If the request is successful, we return the JSON with status 200. Otherwise, we will send the requester what the problem was. Error code 422 means Unprocessable Content. You can send any status code you want :D.
- This log, on line 5, appears on the server side, meaning you will see it in the IDE’s terminal. In the following screenshots, you can see the difference between the logs: server-side logs and the client-side logs.
Let’s Deploy!
Local deployment
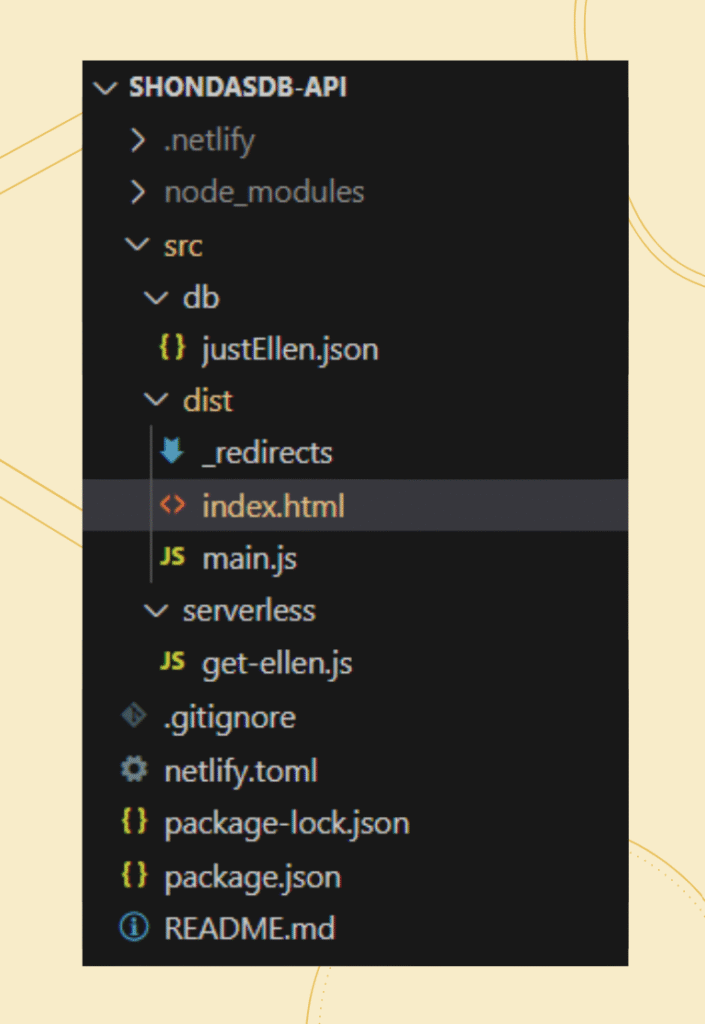
Run locally with netlify dev. Once you run it, a ./netlify directory will be created, and also a .gitignore file!
This is how your project tree is supposed to look:
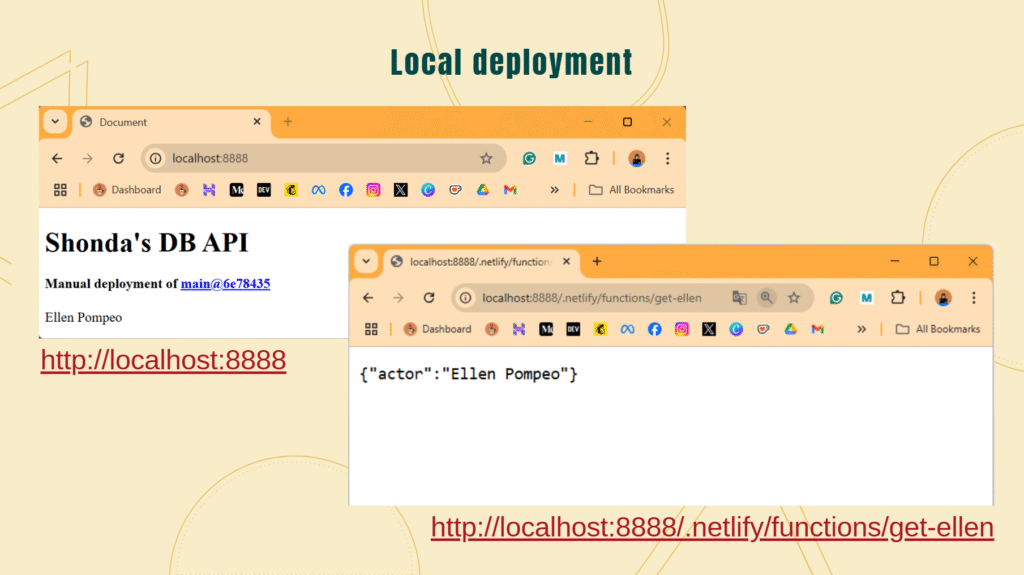
Note that while it’s running, if you try reaching http://localhost:8888/.netlify/functions/get-ellen directly, you will get the response in the browser — this is the API endpoint!
Now that it works, we can add a header for content type to be JSON:
In get-ellen.js:
...
return {
  statusCode: 200,
  body: JSON.stringify(actorList),
  headers: {
    'Content-Type': 'application/json',
  },
}
...
It doesn’t look like a big difference using our current data set example, but it will be very useful when the JSON object gets bigger.
If we were tempted to replace body: JSON.stringify(actorList) with body: actorList we would encounter one of the 2 errors (depending on the complexity of the object):
Your function response must have a string or a stream body.
You gave: [object Object]
---
Your function response must have a string or a stream body.
You gave: { actor: 'Ellen Pompeo' }
Another nice tweak is creating a user-friendly URL:
In netlify.toml:
[[redirects]]
  from = "/get-ellen"
  to = "/.netlify/functions/get-ellen"
  status = 200
That way, we can reach the API with the URL http://localhost:8888/get-ellen
Did you reach this stage successfully? Does your project look the same? Let’s celebrate this milestone with a meme! 😀
Deploying on Netlify
Now it’s a good opportunity to learn how to make it work for you on Netlify, before you put in more effort, and also for you to reserve a cool URL ASAP (Sorry, shondasdb-api is already taken 🙂 ).
I’m not going to cover the introduction to Netlify, it’s pretty straightforward: Sign up -> Add new site.

Netlify provides 3 ways to deploy a website:
- Import an existing project from Git (or other version control system)
- Start a project from a template
- Deploy manually.
Usually, my go-to is manual deploy, because it’s a quick drag & drop. Once you deploy manually, you’ll notice that you receive a “page not found” error. This is because Netlify can’t find the index.html page.
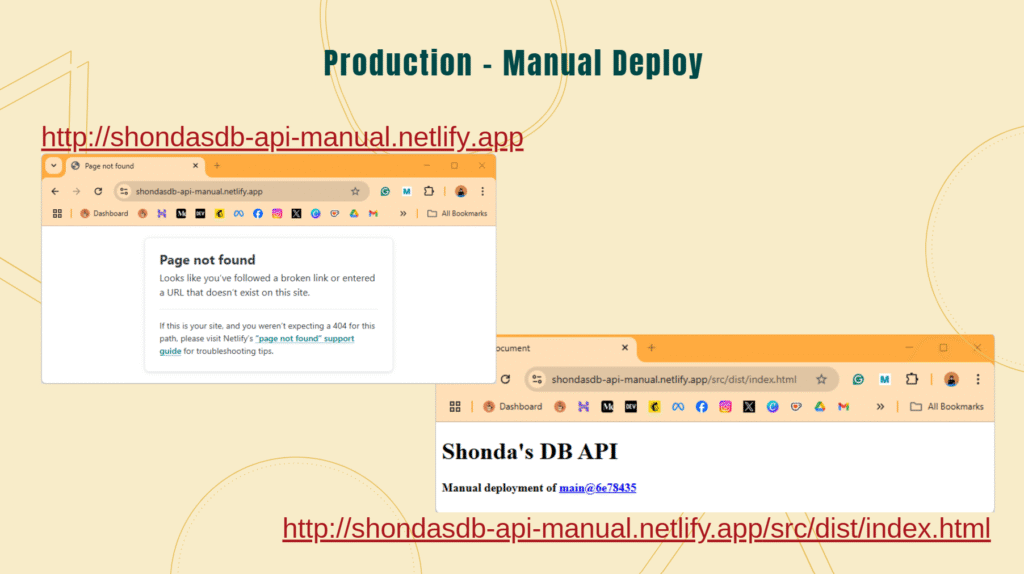
I’ve tried solving it with redirecting configurations, both within the netlify.toml file and a separate _redirects file. It didn’t work. Considering we are creating an API and not a regular web page, it’s not a critical issue, as long as the API endpoint is reachable. But is it?
If you try reaching https://shondasdb-api-manual.netlify.app/.netlify/functions/get-ellen, the same way we did with the local deployment (http://localhost:8888/.netlify/functions/get-ellen), you’ll see it doesn’t work!
Looking at the deployment page on Netlify, we can tell that no functions were deployed:
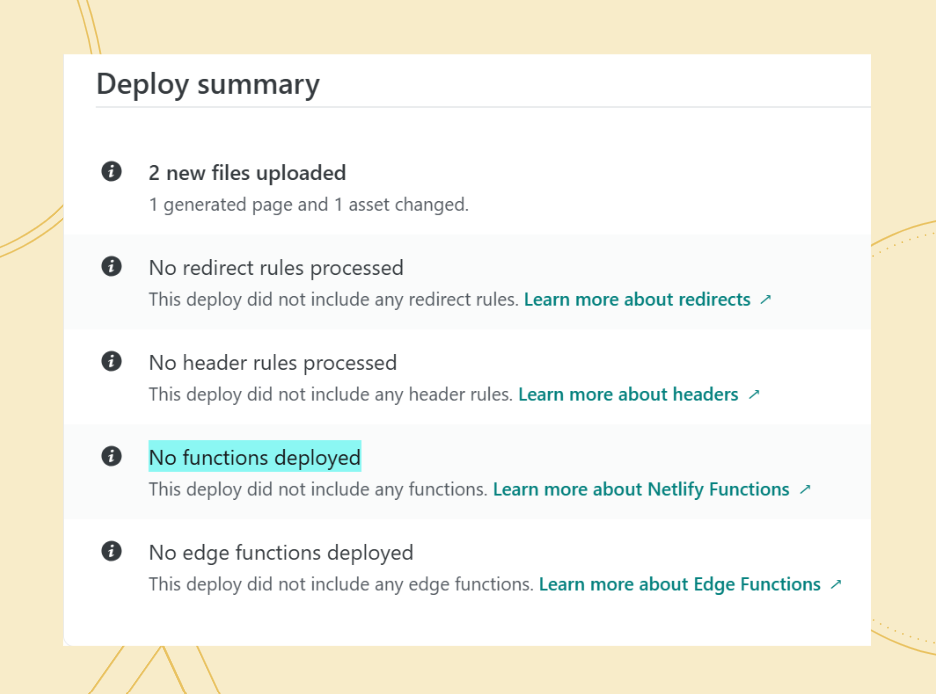
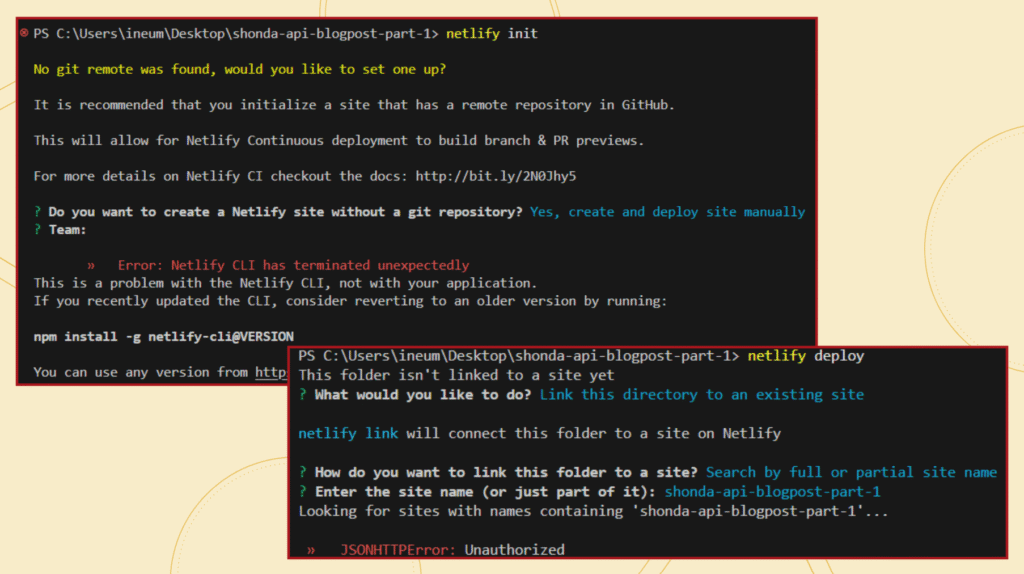
Deploying functions on Netlify is different than deploying a simple website. The manual way of functions deployment divides into 2 options: Manual deploys with the CLI, or file digest deploys with the API.
I’ve tried manual deploys with the CLI and got blocked by errors*. The file digest route is too complex, compared to continuous import via Git, so that’s where I decided to change the approach: We’ll connect to Git!
After creating a repository on Git and connecting the project (you can connect just a single project, not the whole Git account), it still doesn’t work!
Error: Cannot find module '../db/justEllen.json'
Now the problem is that Netlify doesn’t have access to our dataset. We need to explicitly include those in the netlify.toml file:
[functions]
  included_files = ["src/db/**"]
Finally, it works! https://shondasdb-api.netlify.app/get-ellen/
Meme break!

Get a Random Actor API Call
Our goal here is that every time we call the random actor API, we’ll get another actor’s data. This is the time to use the real dataset: https://shondasdb-dataset-v1.netlify.app
Just to clarify, this file (and the other json objects coming from https://shondasdb-dataset-v1.netlify.app website) is external to our project! I’ve created this dataset using TMDB’s API, and I’ll tell you all about it in a future blog post.
Now we create the lambda function in src/serverless/:
Note that this time we are using fetch instead of require, because we are getting data from an external resource.
The structure of the dataset is not ideal for the random actor function: We start by grabbing this huge object, then we pull a list of the keys, then pick one key randomly, all for one actor’s data. It would’ve been quicker to create an array of actor data, instead of a dictionary, where we could reach castData[“actors_data”][8] directly.
But keep in mind that this dataset was created for another purpose: Given a show, we pull the list of actor IDs, and each of those IDs is the key to the actor’s data.
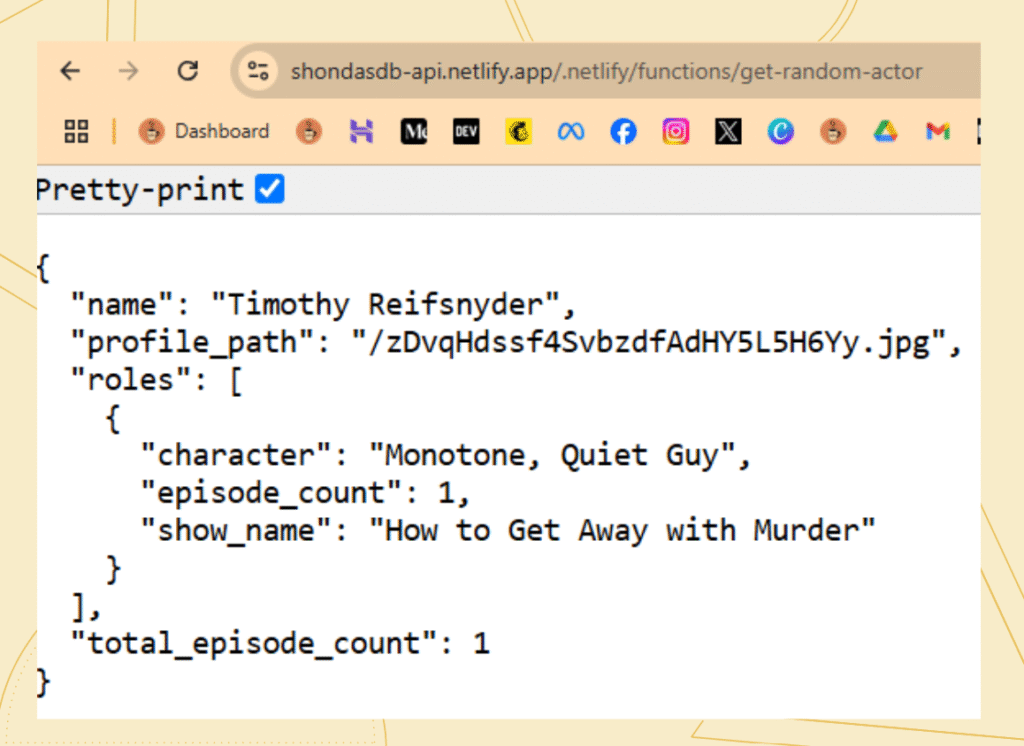
That’s it! We have another API endpoint: https://shondasdb-api.netlify.app/get-random-actor. And just like the Doggies, it will return a different actor every time we refresh 😀
Get Top Cast For Show API Call
Remember earlier that I mentioned that most of Shonda’s shows are off-air? With that in mind, I thought it would be better to save the list of top cast IDs in a different file, considering it will not require updating.
I also chose to have a file for each show, because the functionality of the website I had in mind is that every request contains a single show, so why load the data for all shows?
Therefore, the file listing the top cast actors’ IDs for Grey’s Anatomy, for example, can be found here: https://shondasdb-dataset-v1.netlify.app/actorIds/1416.json. We will call this link in our project. And by the way, 1416 is the show ID, and it matches the one from TMDB.
We want to create a function that can receive a path parameter — show id. Then, will read the corresponding file, and return the data. Once that works, we will add query string parameters, so our users could fine-tune the API to their needs 😀
Let’s start by creating a new function under src/serverless/:
On line 2, I’m extracting the show ID from the URL and using it in line 27 to fetch the correct JSON object. Then I’m creating a small dataset with just the actors in that array. Finally, I’m sending back an object containing the actors data dictionary and the actors IDs array. The array’s purpose is to keep track of the order (descending number of episodes).
Notice that on line 30, we slice to return only the first 10 actors. But why not let the user choose? Let’s add query string parameters!
From my previous work with Spotify’s API, I learned that offset and limit are very useful and popular parameters. The limit determines the size of the array returned, and the offset controls the starting point.
We’ll start from the usage and end with the initialization. All the changes are within the function file get-top-cast-for-show.js.
In getActorIds we’ll add two additional parameters (from, limit) and adjust the slice to use them. Note that the end of the slice is the sum of the index we started at PLUS the size of the array: if offset is 3, and limit is 5, the slice will be 3–8!
async function getActorIds(showId, from, limit){
  ...
  const to = Number(from) + Number(limit)
  return actorIdsObj["actor_ids"].slice(from, to)
}
Now, we’ll add a function to parse the parameters. Because it’s a getter, this is a good place to set the default values: I chose offset 0 and limit 10.
function getParams(queryStringParameters){
  let limit = 10, offset = 0 // default
  if (queryStringParameters){
    if (queryStringParameters.limit && queryStringParameters.limit<100 && queryStringParameters.limit>0){
      limit = queryStringParameters.limit
    }
    if (queryStringParameters.offset && queryStringParameters.offset<100 && queryStringParameters.offset>0){
      offset = queryStringParameters.offset
    }
  }
  return {limit, offset}
}
Note that the user has the option to use just one of the parameters.
And finally, initializing the variables:
exports.handler = async (event) => {
 const show_id = event.path.replace('/.netlify/functions/get-top-cast-for-show', '').replace(/\//gim, '')
 let {limit,offset} = getParams(event.queryStringParameters)
 try{
...

Pretty cool, right??
Oopsi

So while working on this blog post, I gracefully ignored the Access-Control-Allow-Origin header in the code, because it worked without it. 😀
It’s only when I tried grabbing some screenshots from the final product (the website deployed on Netlify) that I realized it didn’t work.
So, before we continue, please go back to the functions and modify them to:
...
headers: {
  'Content-Type': 'application/json',
  'Access-Control-Allow-Origin': '*'
},
...
The * is to give access to everyone. In our case, we want the API to be public!
Future plans
This was a fruitful blog post where I showed you, step by step, how I created API calls with parameters. Before we go our different ways, let me share with you two ideas I had that I didn’t implement yet, and I might never will (it takes great discipline to follow up with part 2s!).
Let’s get the juices flowing: How would you design this solution? You might decide it requires a dataset structure change. Maybe you think it’s a frontend issue, and shouldn’t be handled in the API.. Let me know in the comments!
Feature Request #1: Remove Duplicated Roles
Some of Shonda’s shows exist in the same universe, meaning that the shows are different, but the characters are the same. For example, Miranda Bailey:
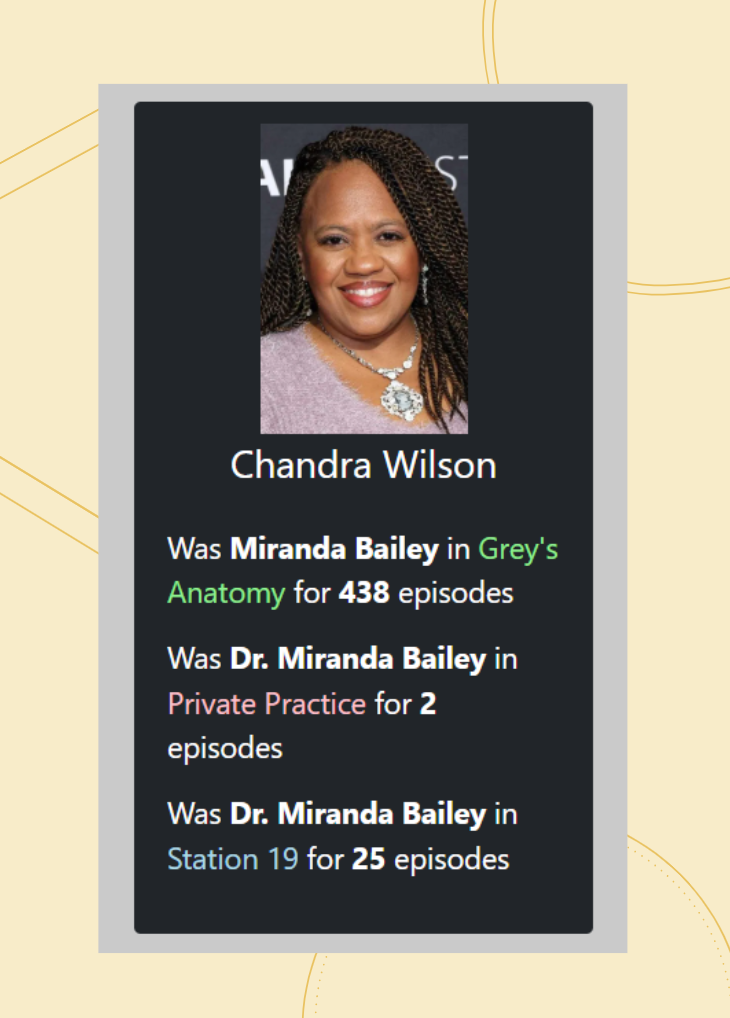
This sabotages the purpose of my website, to show actors playing different roles. On the other hand, I can’t just eliminate the other occurrences from the data, because that would hurt its integrity. A user who’s watched Station 19 and didn’t watch Grey’s Anatomy should see that Dr. Miranda Bailey was in Station 19 as well.
How would you approach this feature?
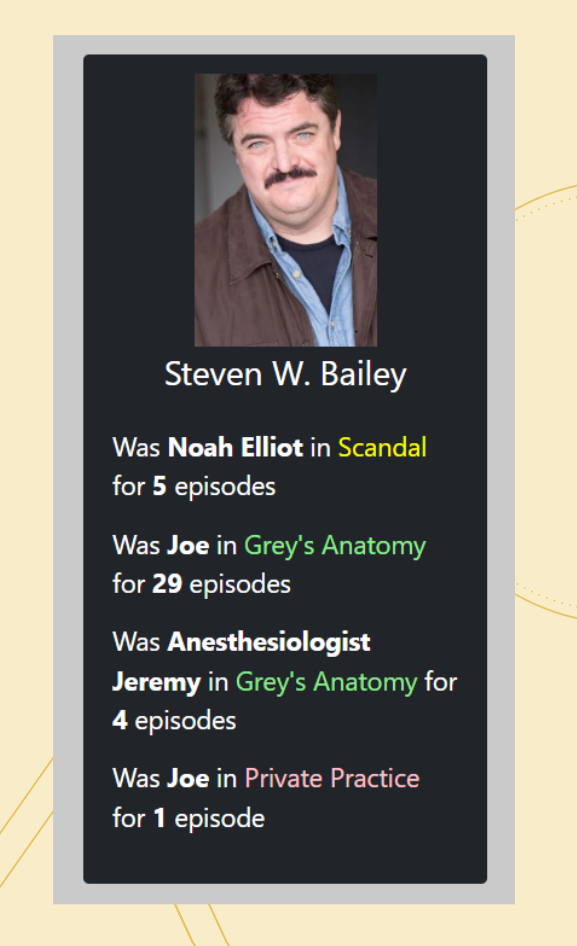
Feature Request #2: Shonda’s Favorites
While working on this project, I was pleased to discover that some actors participated in 3 or even 4 different shows! I’m assuming this means Shonda really liked them 😀 Wouldn’t it be cool to have an API call that returns Shonda’s favorites? Those she keeps calling with offers for roles?
How would you implement that API call, without lots and lots of loops over the data?
Wow! That was a lot! Today, we’ve created an API! We started small with get-ellen, giving us a simple JSON object with.. well.. ellen!
After we assured our deployment went smoothly, we started creating more interesting APIs — get-random-actor, that every call returns a different actor’s data.
Lastly, we created get-top-cast-for-show, which is the reason we gathered here today: Given a show ID, return the top actors’ data. This data will be used in Shonda’s DB website, which we will work on in the next blog post!
*Errors when trying to deploy the functions via the CLI: